
Getting Started
Before you start
SteelSQL ships with a Preview Connection — a small SQLite sample database — so you can follow every step below without preparing a server. To connect your own database, jump to Connect your own database at the end.
▶ Tutorial
Open a table → create a table → edit rows → run a query
Step 1: Open a table
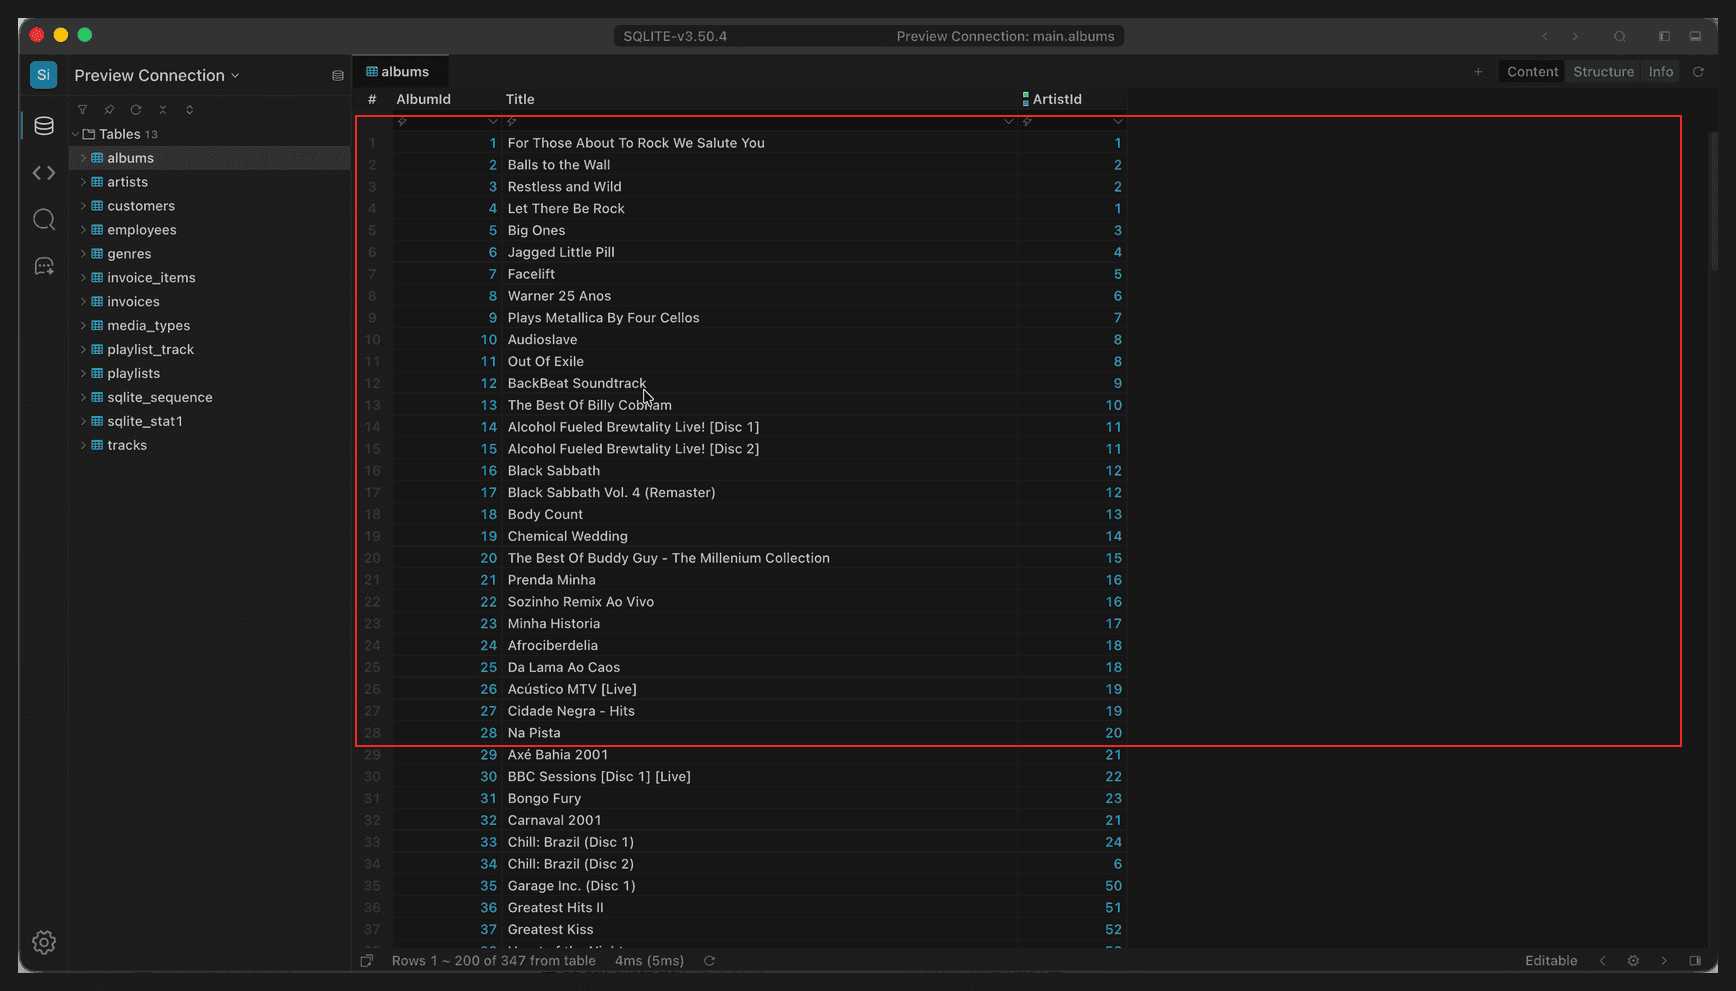
Full window; the table data is highlighted
- In Navigation on the left, expand Tables.
- Click a table name, such as
albums. - The Content view opens and shows the first 200 rows; the status bar reads
Rows 1-200 of 247 from table. - Scroll to the bottom to keep loading, or press
Cmd+R(Ctrl+Ron Windows) to fetch again.
The top-right of the same tab switches to Structure and Info, which show the table definition and its DDL.
Step 2: Create a table
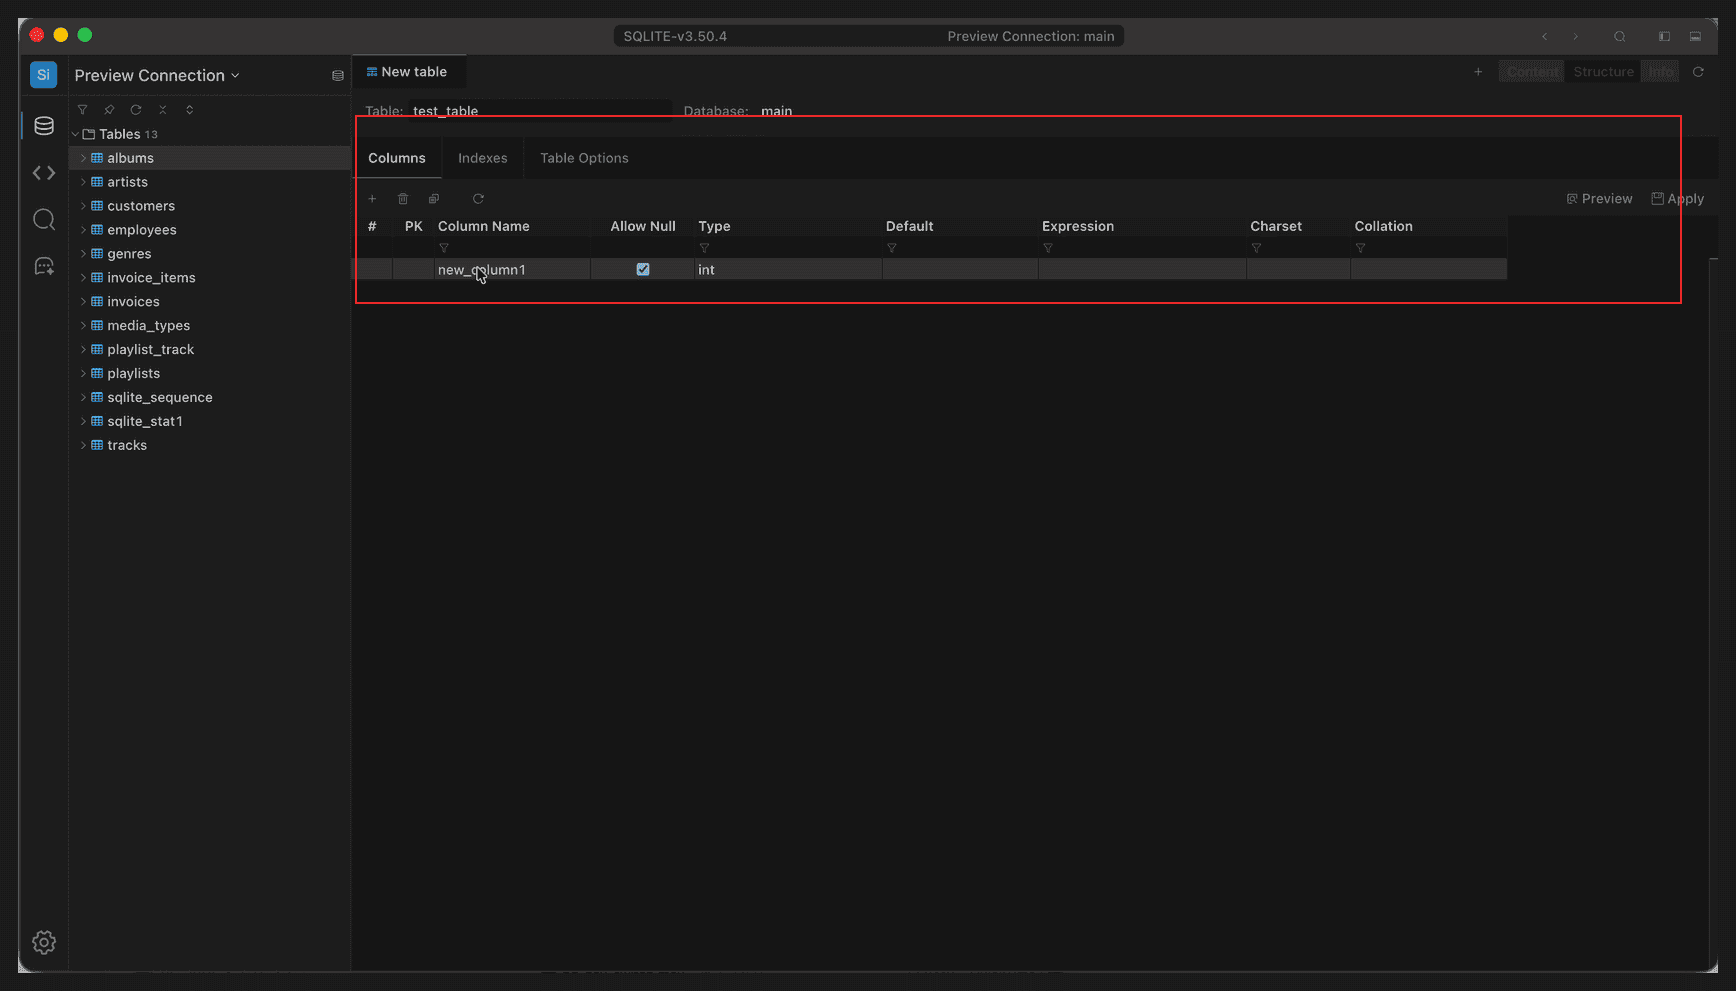
Full window; column definitions in the Structure view
- Switch to Structure and open the Columns tab.
- Fill Column Name, pick a Type, and tick Allow Null or set a default when needed.
- Use Preview to inspect the DDL that will run, then Apply it.
The new table appears under Tables in Navigation as soon as it is created.
Step 3: Edit rows
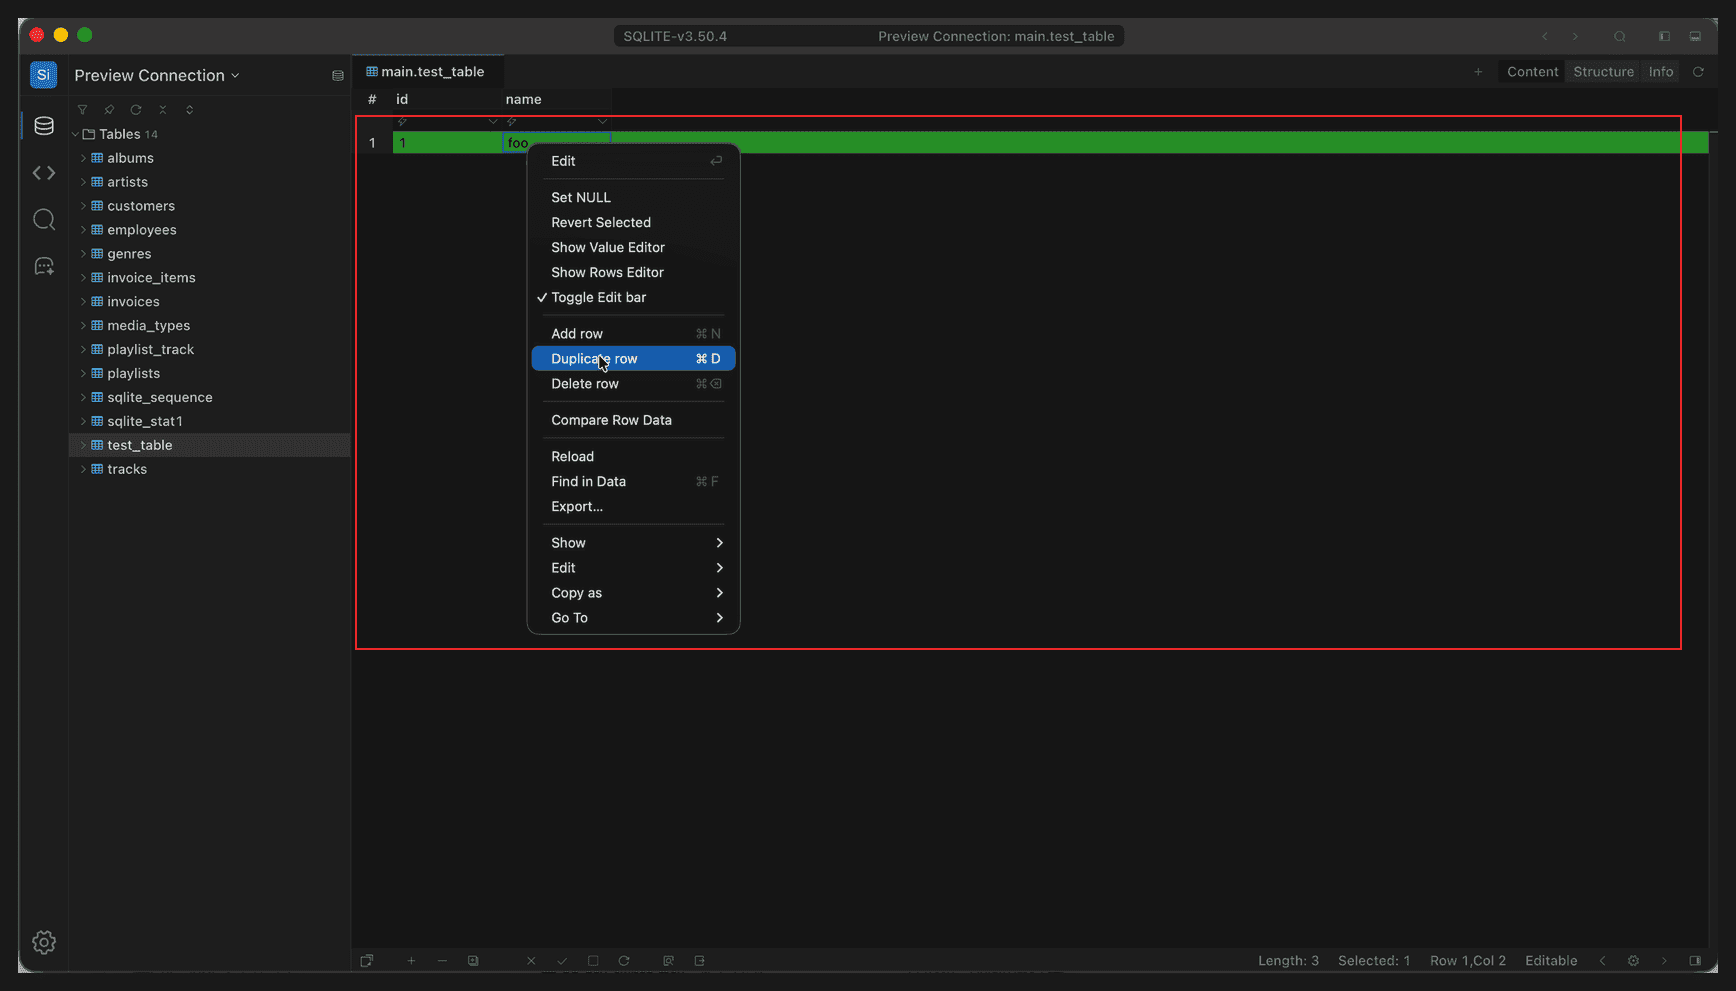
Full window; the row context menu is highlighted
Right-click any row in the data area to reach the common actions:
| Action | Shortcut |
|---|---|
| Add row | Cmd+N, Ctrl+N on Windows |
| Duplicate row | Cmd+D, Ctrl+D on Windows |
| Delete row | Cmd+Backspace, Delete on Windows |
| Set NULL | — |
| Revert Selected | — |
| Copy as ▸ | — |
Double-clicking a cell edits it in place. Changes stay in the window until you press Apply; Revert discards them.
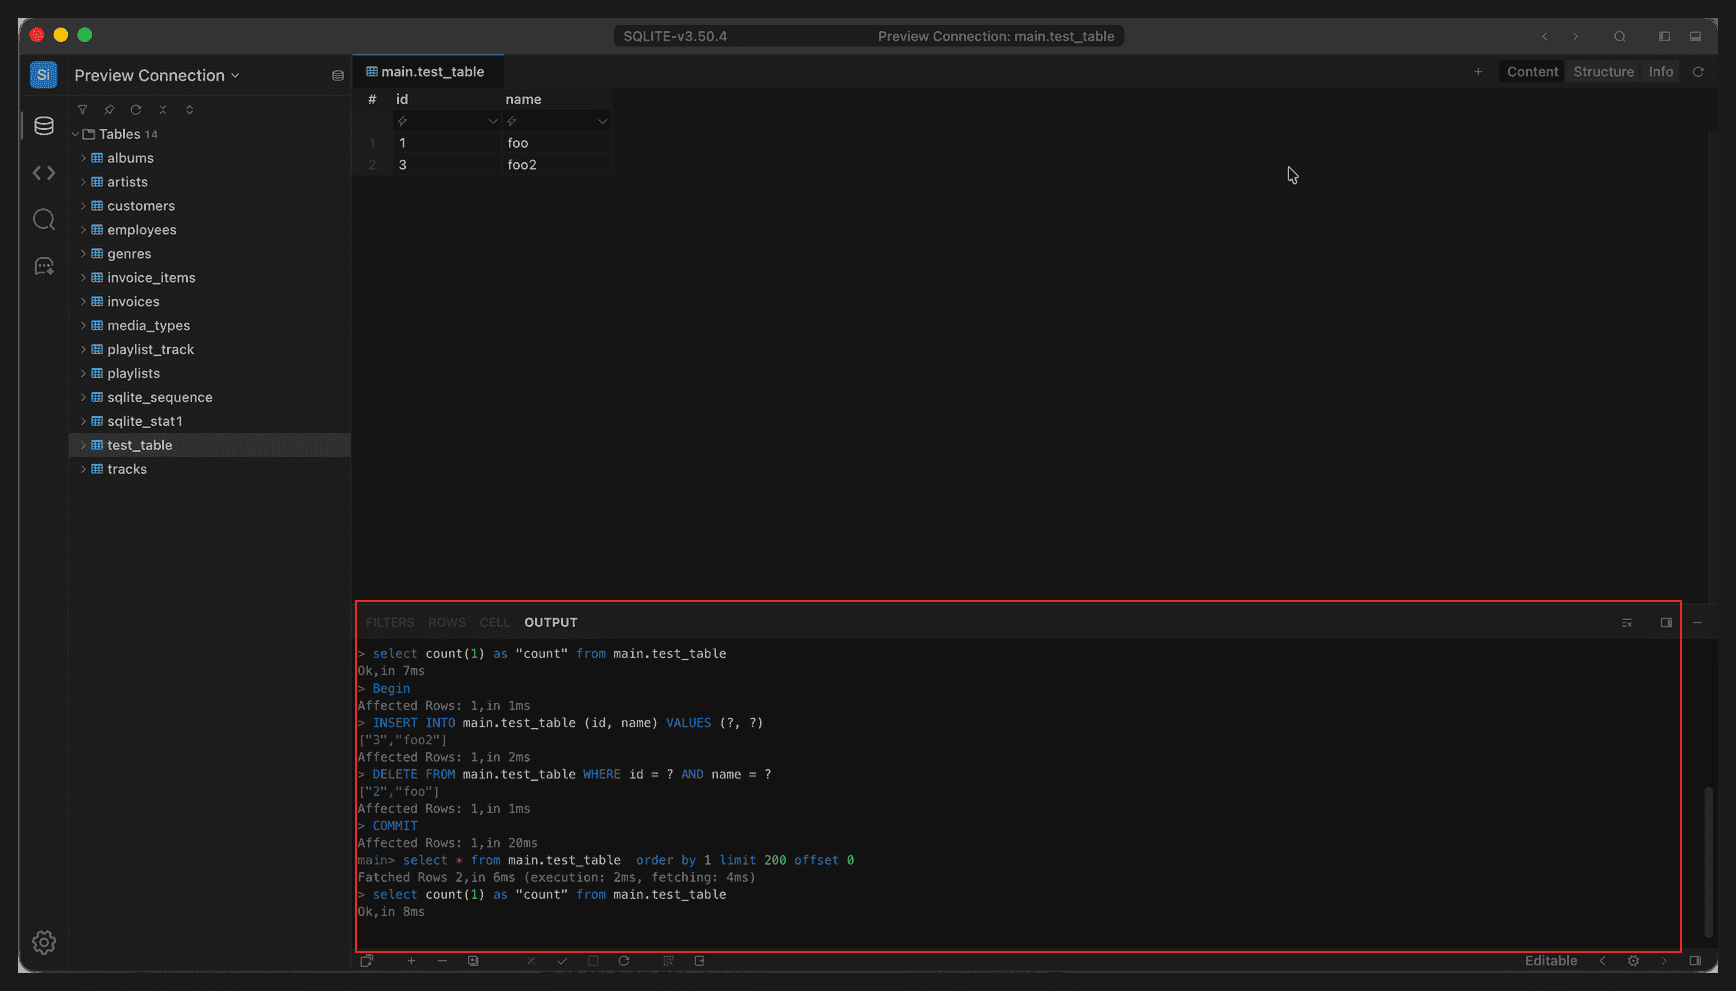
Full window; the statements recorded in OUTPUT
After applying, OUTPUT lists the statements that actually ran:
Begin
INSERT INTO main.test_table (id, name) VALUES (?, ?)
DELETE FROM main.test_table WHERE id = ? AND name = ?
COMMIT
Every write is followed by Affected Rows, so you can confirm the expected rows changed.
Step 4: Run a query
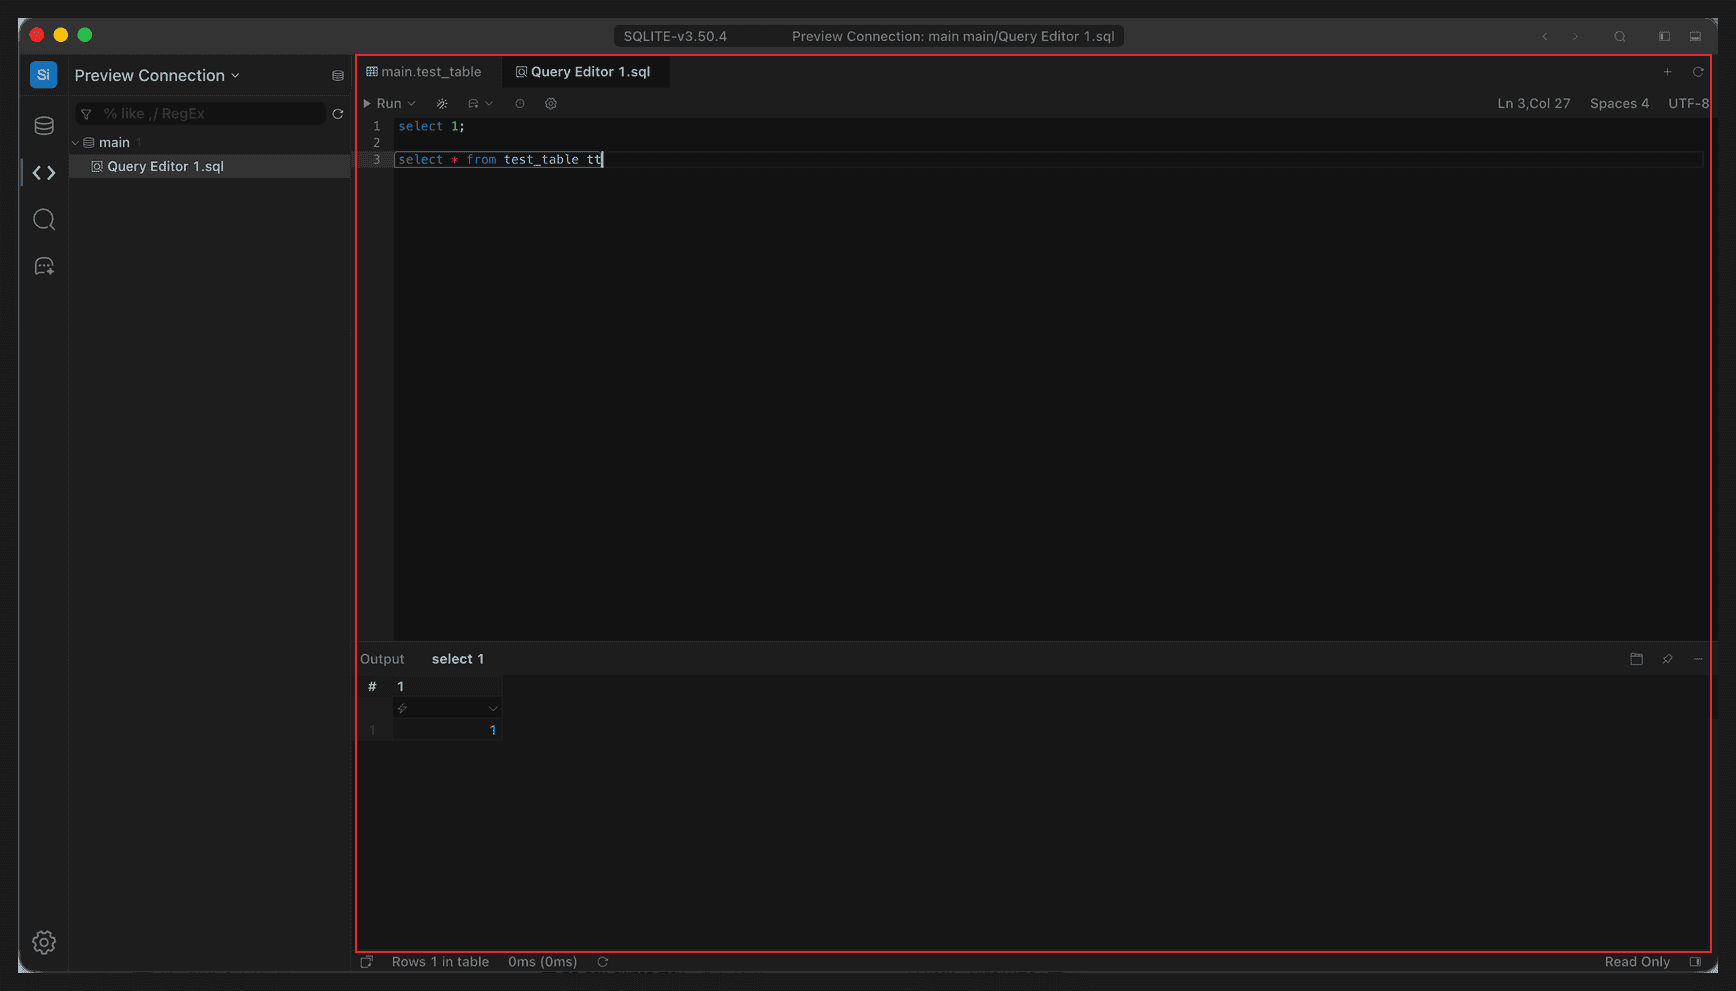
Full window; Query Editor and the result tab
- Click the
<>icon in the navigation bar to open the query panel. - Create a Query Editor and enter SQL:
select 1;
select * from test_table t;- Click Run, or press
Cmd+Enter(Ctrl+Enteron Windows). - Each statement gets its own result tab; here
select 1showsRows 1 in tablein the status bar.
Separate statements with semicolons. They run in order, and the result tabs follow that order.
Connect your own database
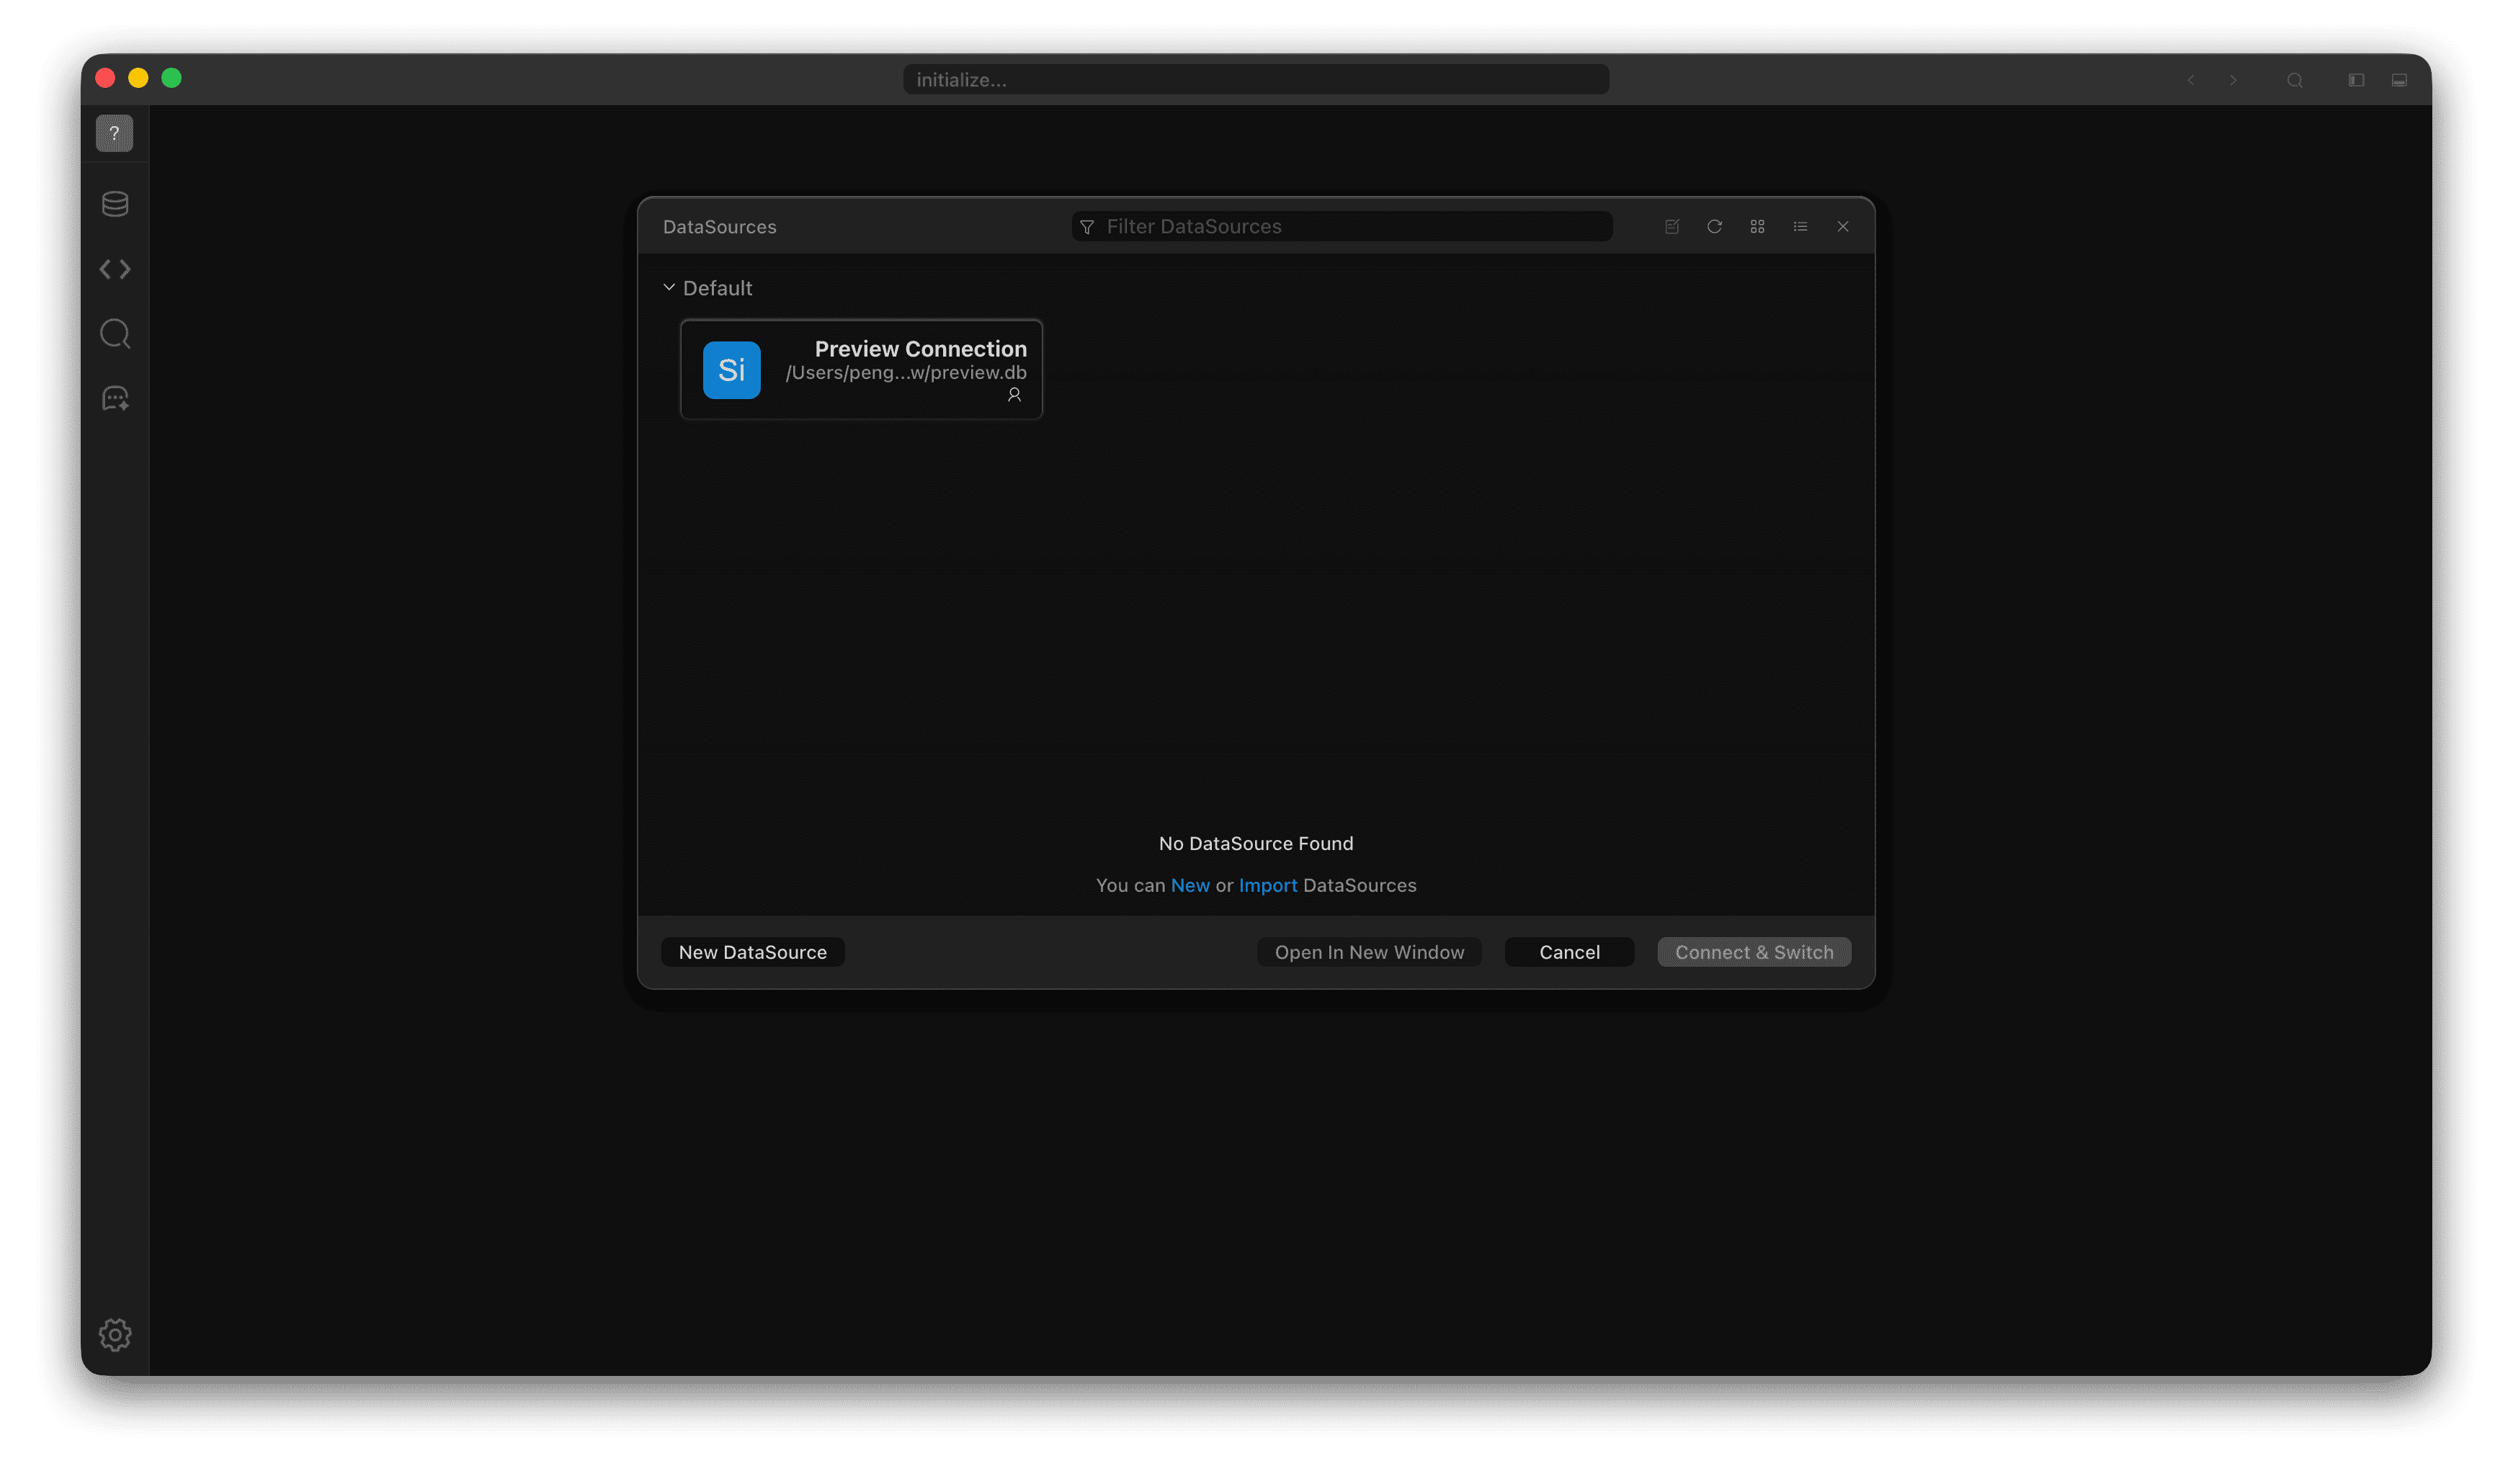
DataSources panel: search on top, New DataSource at the bottom
- Click the database icon at the top of the navigation bar to open DataSources.
- Click New DataSource and choose a database type.
- On General, fill Name, Host, Port, User, Password, and Database.
- Click TEST; the result below shows version, isolation level, database name, and encoding.
- Click CONNECT & SAVE to save the connection and open it immediately.
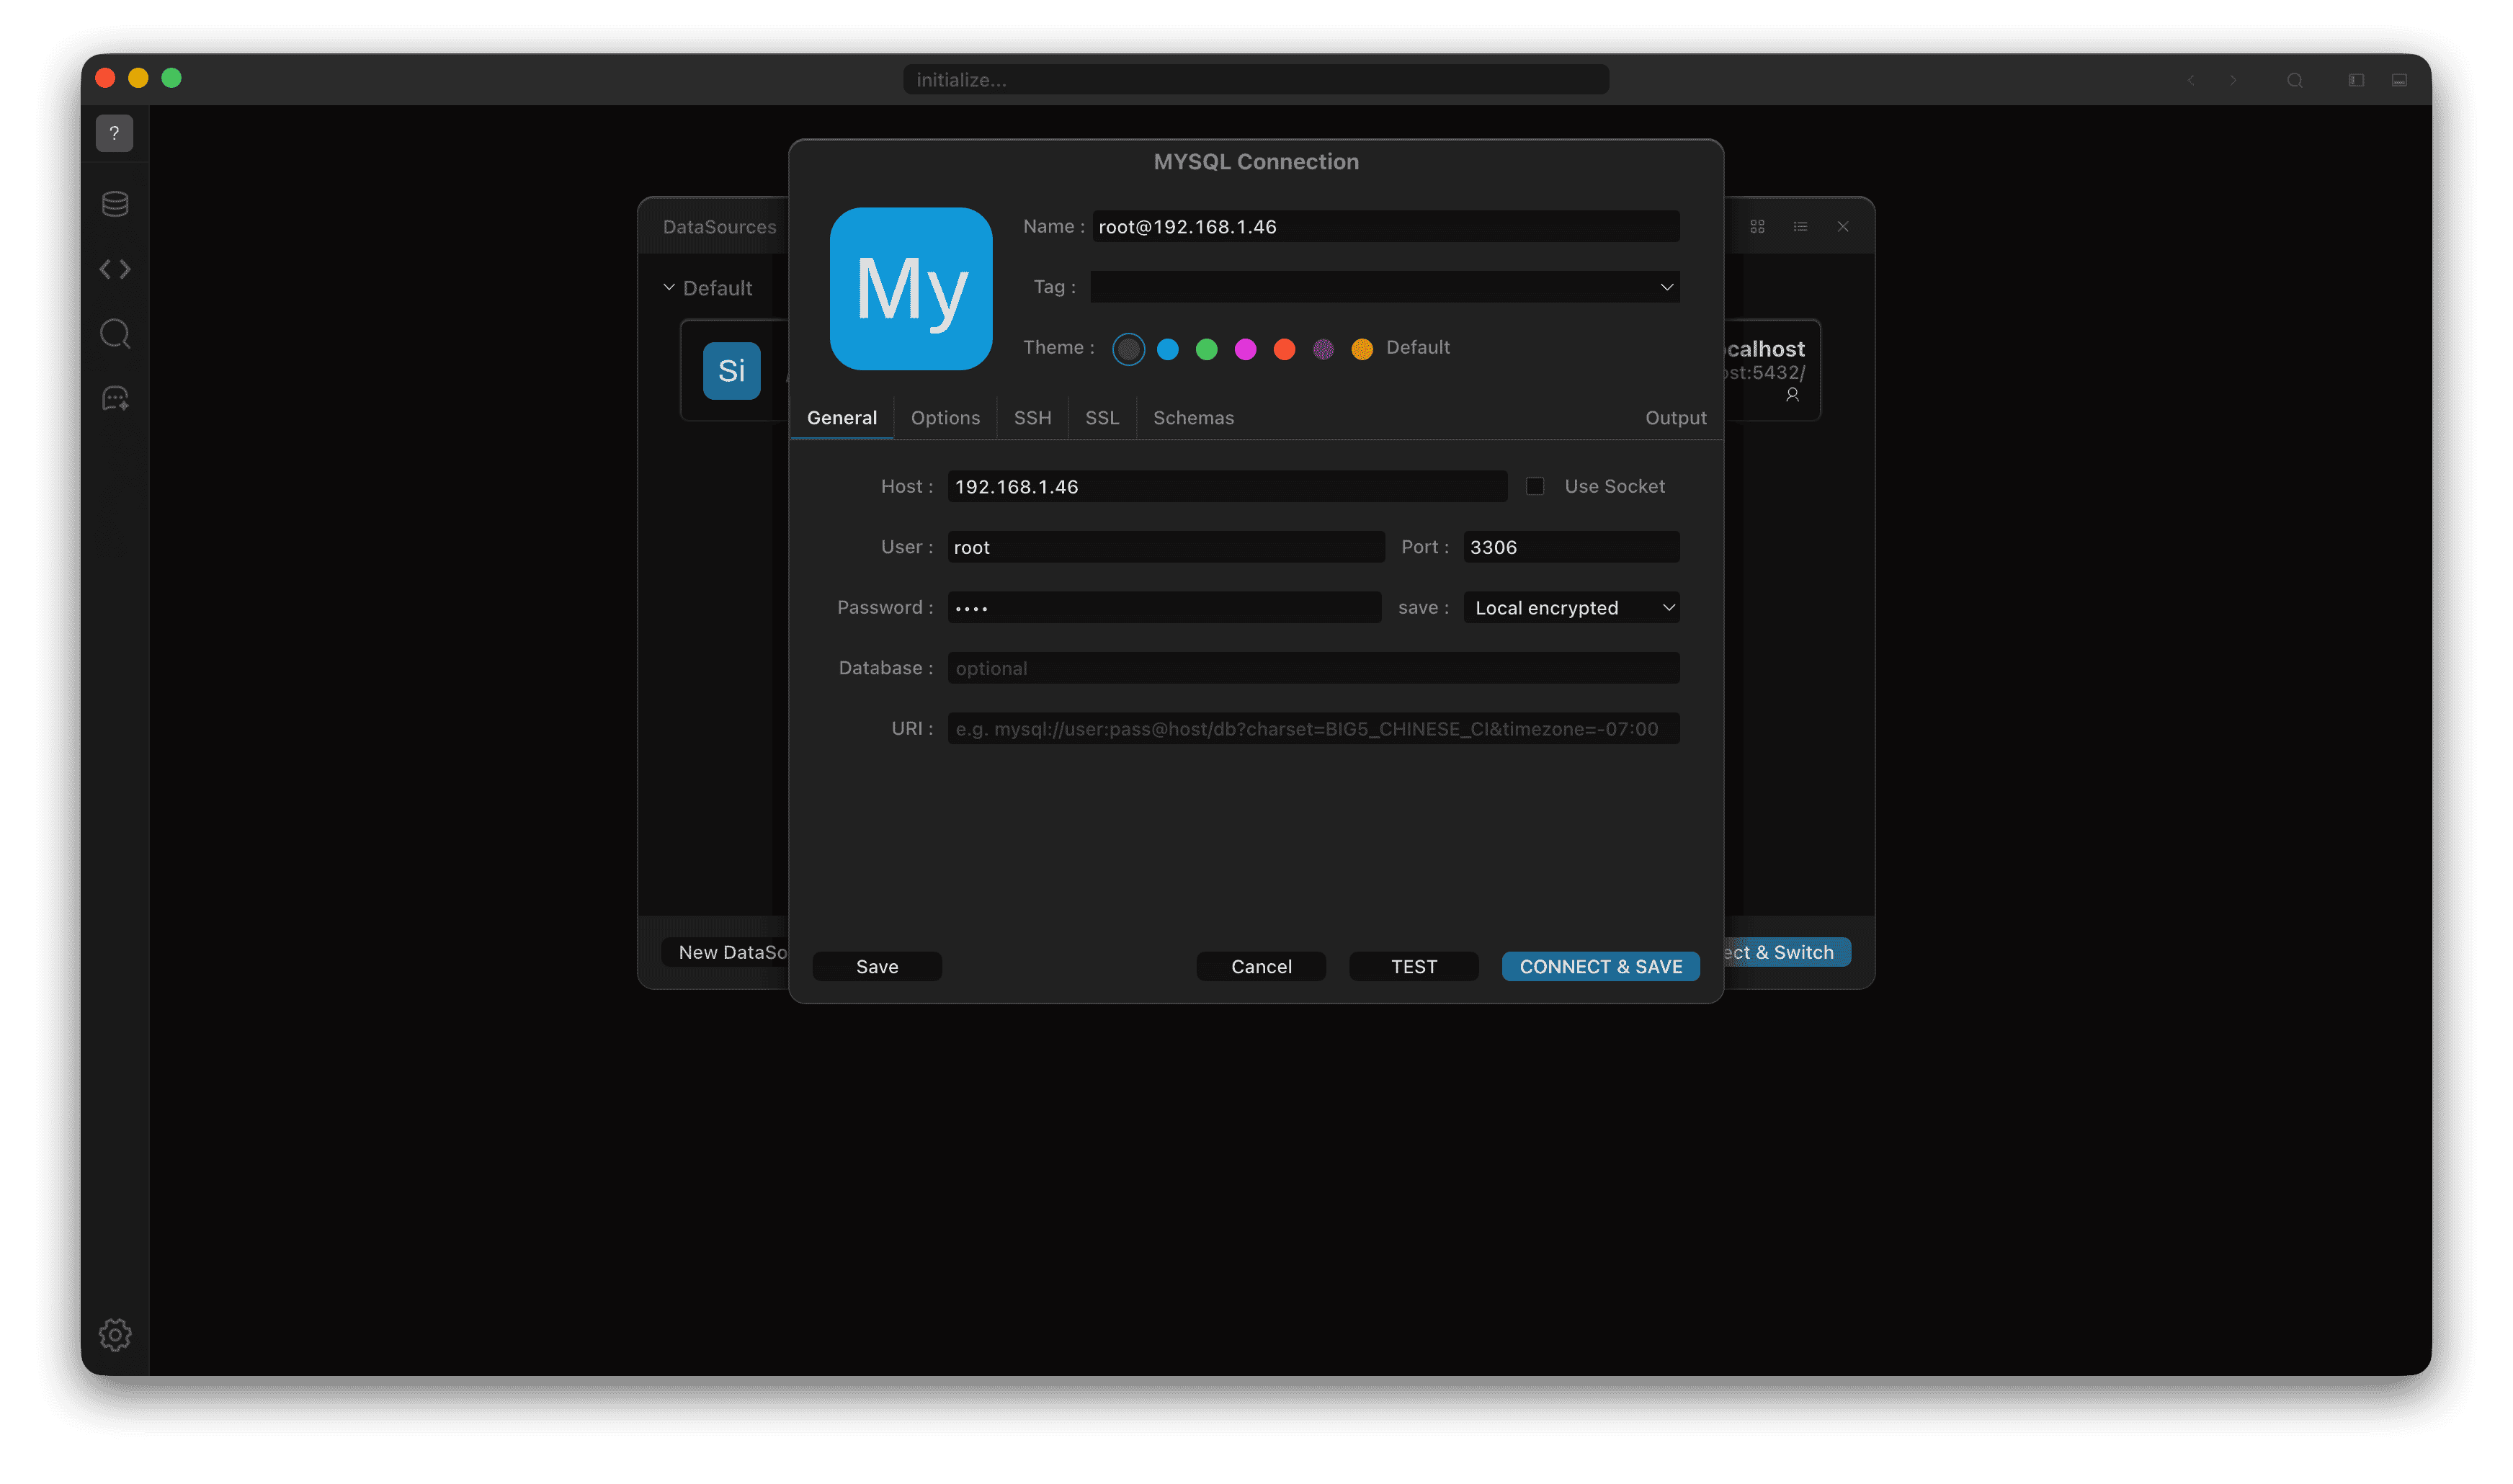
General tab: name, host, user, port, and database
Where to go next
- Panels and workspaces: Navigation
- Browsing, filtering and editing data: Content
- Managing and running SQL files: Query nav
- Searching tables and commands: Open Everything
- Exporting results to a file: Export