
Export Data
This page covers exporting query results to a file: where to open it, which formats are available, how to configure each SQL statement, and where to find the results after it runs.
What export does
Export writes SQL execution results to files: enter one or more statements and each result set is written to its own file. The export target is the query result, not the table structure; to include filters, put them in the SQL.
You can export multiple statements at once, separated by semicolons ;. Each statement is one item in the task list, where you can rename it and view its output location individually.
▶ Tutorial
Select format → enter SQL → run
Start an export
Export is not a persistent panel. It opens from the three entry points below, all with the same effect:
| Entry | Location | Description |
|---|---|---|
| File → Export … | File main menu | General entry, available once a connection is established |
| Export… | Data area (DataGrid) context menu | Export directly from a result set |
| Export Table… | Context menu of a table node in the object tree | For a whole table |
After opening, the window title shows the target connection, for example:
Export POSTGRES pengtian@localhost chinook.publicPOSTGRES is the dialect; the rest is the connection name and the current database / schema. Query Sql in the window can be left empty for you to fill in, and it accepts multiple statements.
Options
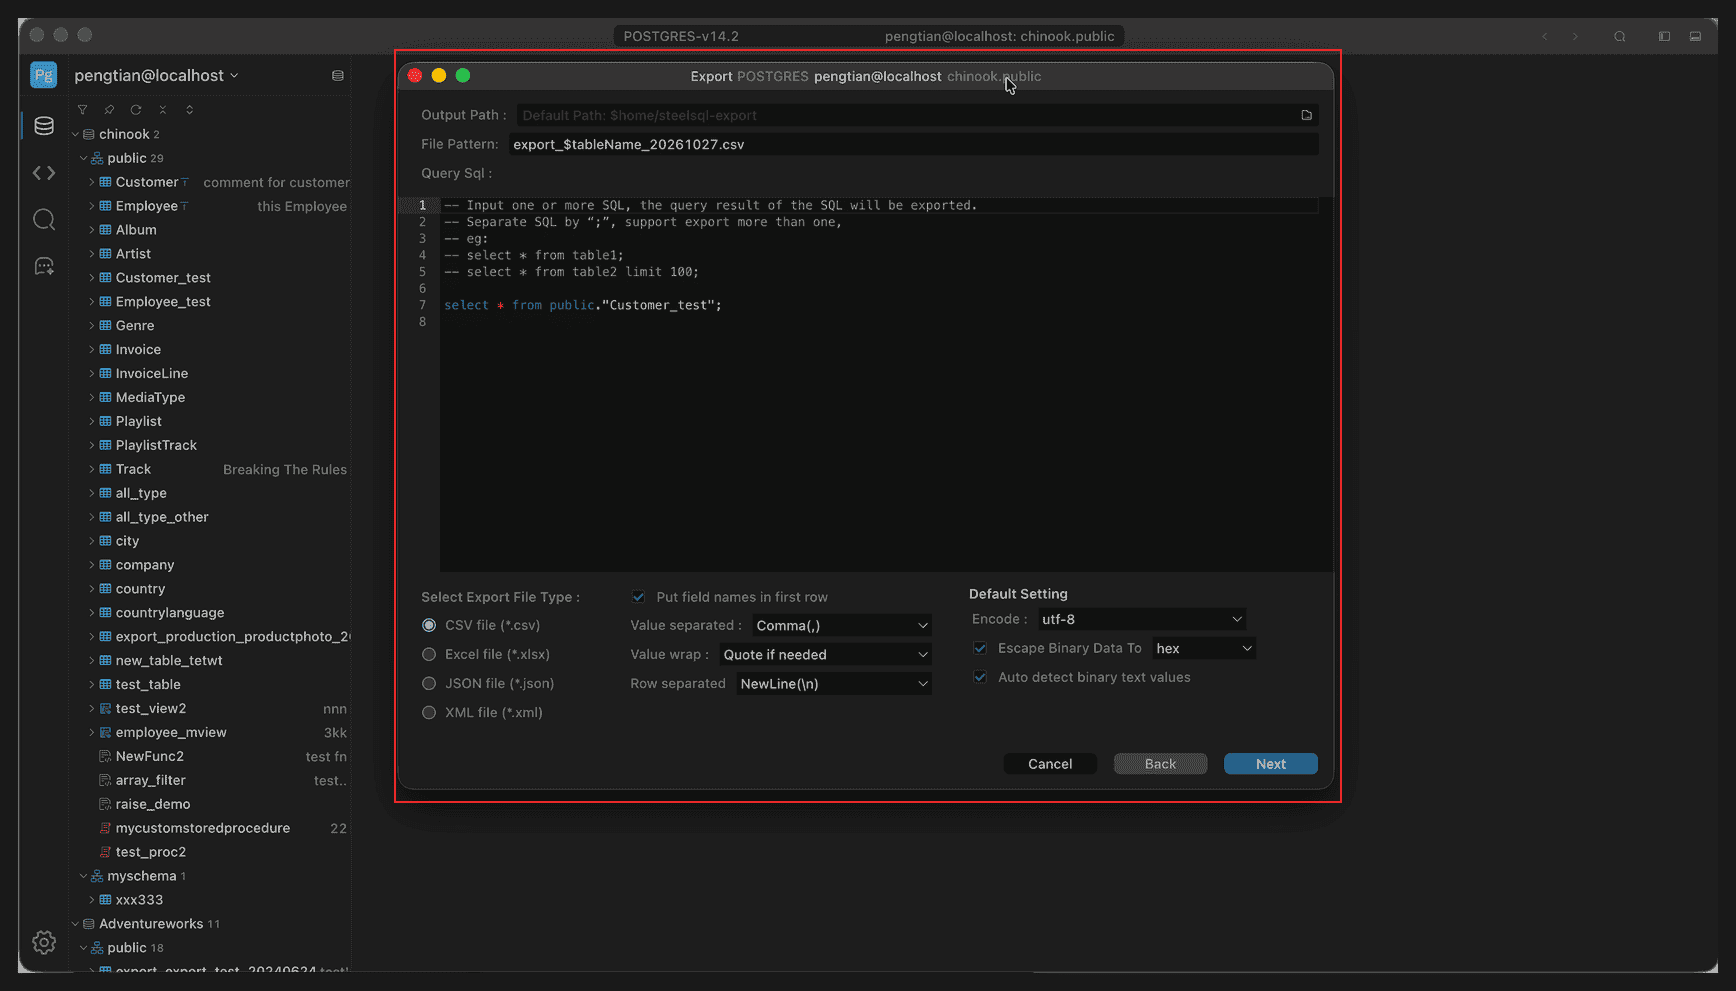
Full window view; the red box marks the export window
| Field | Description |
|---|---|
| Output Path | Output directory, default $home/steelsql-export; click the folder icon on the right to change it |
| File Pattern | File name template, by default something like export_$tableName_20261027.csv; $tableName is replaced with the table name and the date part is generated for the current day |
| Query Sql | SQL to execute; separate multiple statements with ;; comments start with -- and are not executed |
File types
Four output formats; choose one:
| Type | Extension | Description |
|---|---|---|
| CSV file | .csv | Plain text, configurable delimiter and encoding, most universal |
| Excel file | .xlsx | Generates a workbook directly, convenient for handing off to business users |
| JSON file | .json | One object per line, suited to programmatic consumption |
| XML file | .xml | Structured format for integrating with legacy systems |
CSV options
When CSV is selected, four options are available:
| Option | Default | Description |
|---|---|---|
| Put field names in first row | Checked | Write column names in the first row |
| Value separated | Comma(,) | Field delimiter |
| Value wrap | Quote if needed | Quote when needed, so commas and newlines do not break the structure |
| Row separated | NewLine(\n) | Row delimiter |
Encoding & binary
Default Setting in the lower right applies to all formats:
| Option | Default | Description |
|---|---|---|
| Encode | utf-8 | Output encoding |
| Escape Binary Data To | hex | Binary columns are written as hexadecimal |
| Auto detect binary text values | Checked | Automatically determine whether binary content is actually text |
Task list
Click Next to go to the task list:
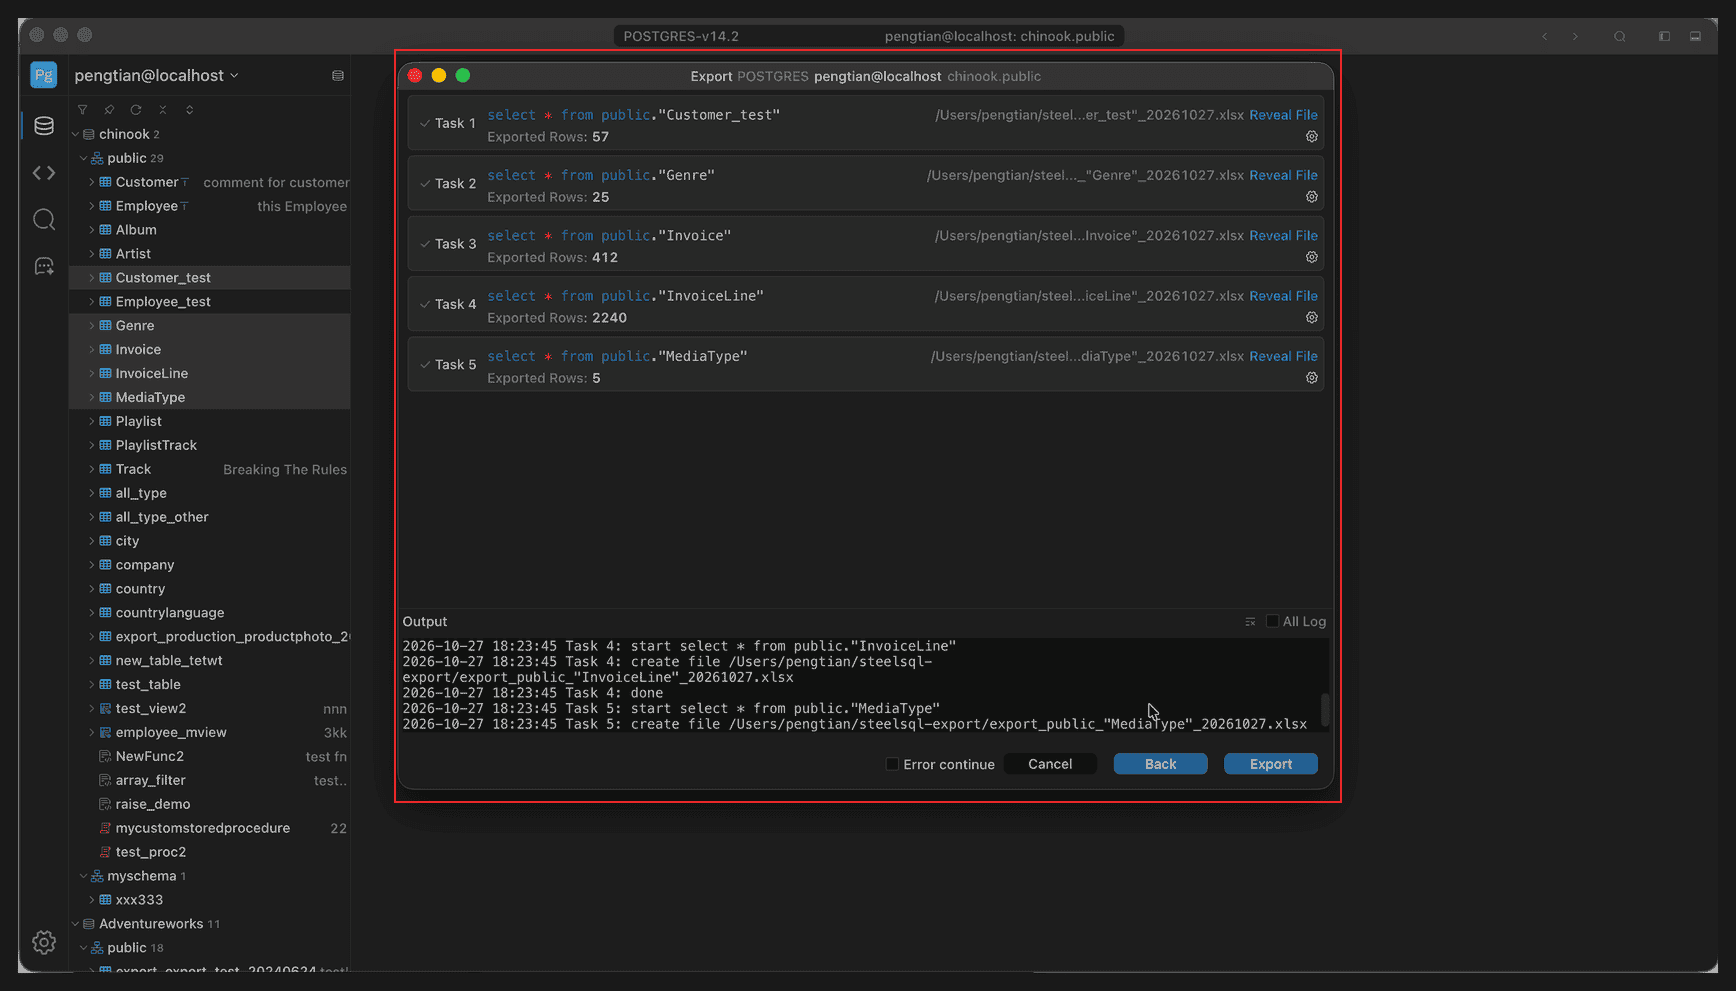
Full window view; the red box marks the task list and output log
- Each statement expands into a Task that you can open to inspect details.
- FileName can be edited per task; you do not have to use the template-generated name.
- Skip Columns skips specific columns: enter column names separated by the delimiter, case-insensitive.
- Exp Res shows how many rows this statement actually exported.
- Reveal File locates the generated file in the file manager.
The task list and the Output log at the bottom update together; you can see start / create file / done for each task.
Run
| Button | What it does |
|---|---|
| Back | Return to the options page to change settings |
| Cancel | Cancel this export |
| Export | Start executing statements and writing files one by one |
With Error continue checked, an error in one statement does not interrupt the remaining tasks; without it, execution stops at the first error.
When execution finishes, the files are in Output Path; their names come from File Pattern or from FileName in the task list.