
Import Data
This page covers importing local files into a table: which formats are supported, how to open it from the UI, how columns are mapped, and which custom SQL you can insert before and after an import.
What import does
Import writes data from a local file into a database table and supports three formats: CSV, XML, JSON. You can import into an existing table, or create a table as part of the import.
▶ Tutorial
Select file → map → run
Start an import
Import opens from the two entry points below, both leading to the same import window:
| Entry | Location | Description |
|---|---|---|
| File → Import … | File main menu | General entry, available once a connection is established |
| Import table… | Context menu of a table node in the object tree | Import into a specific table; Target table in the window is prefilled with that table |
The window title shows the target connection, for example:
import POSTGRES pengtian@localhost chinook.publicStep 1: Select file
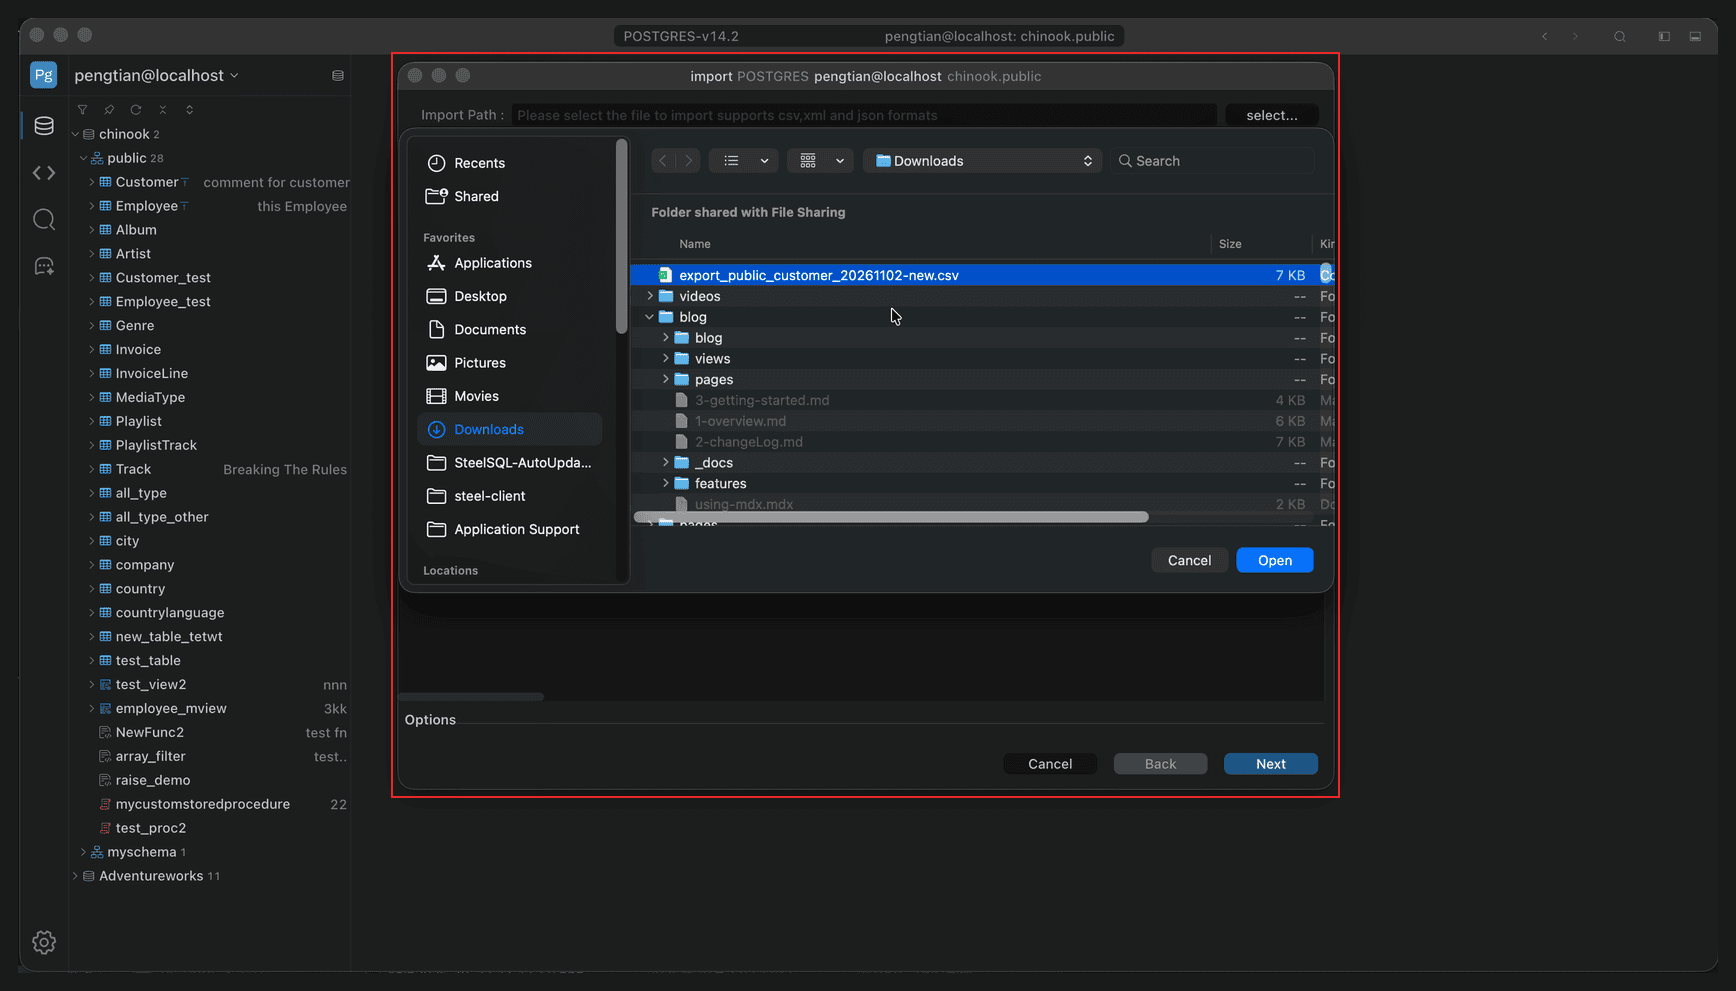
Full window view; the red box marks the import window and file selection
- Open the import window and click select… to the right of Import Path.
- Choose a local file. The title bar shows the target connection’s database and schema, for example
import POSTGRES pengtian@localhost chinook.public. - Click Next to go to column mapping.
Expanding the Options section below reveals additional options; the defaults are fine.
Step 2: Map columns
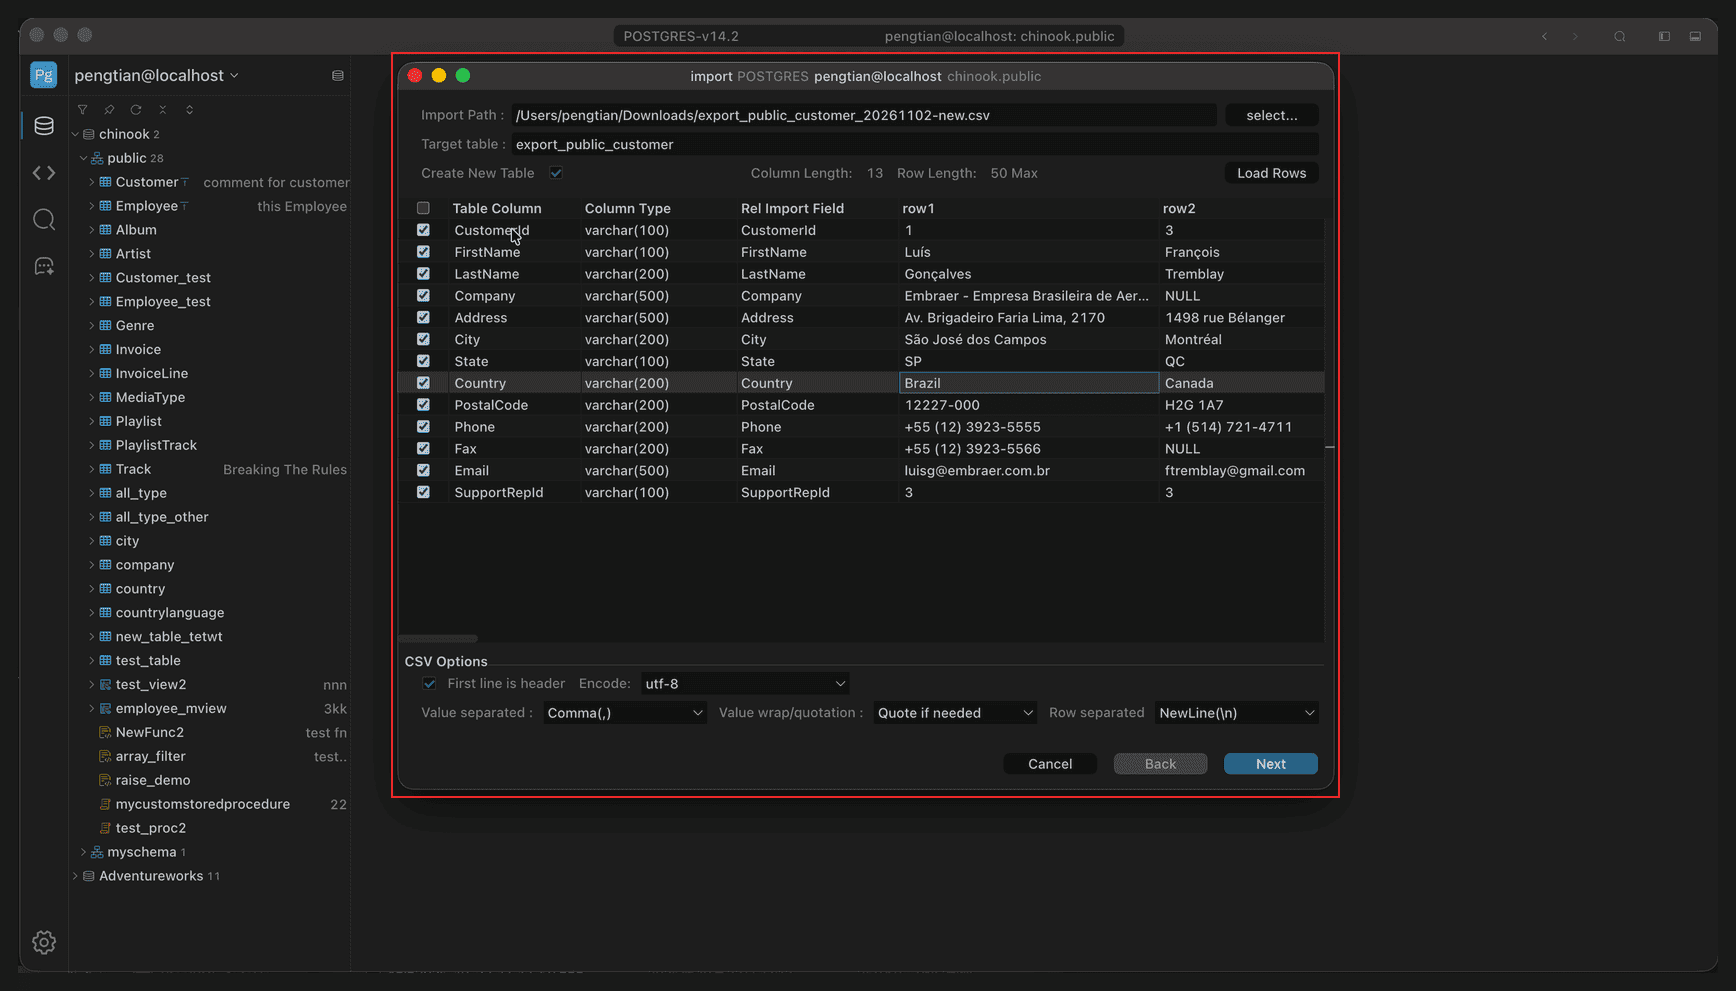
Full window view; the red box marks the column mapping table
The window reads the file structure and lists every column row by row:
| Column | Description |
|---|---|
| Checkbox | Only checked columns are imported |
| Table Column | Column name in the target table |
| Column Type | Target column type, for example varchar(200) |
| Rel Import Field | Corresponding header in the file |
| row1 / row2 | Preview of the first two rows, used to confirm the mapping |
The controls above govern table creation and preview:
- Target table: name of the table to write to.
- Create New Table: when checked, create a new table from the mapping; when unchecked, write into an existing table.
- Column Length: number of columns detected this time.
- Row Length: number of preview rows, default
50 Max. - Load Rows: reread the file preview.
File format options are at the bottom:
| Option | Default |
|---|---|
| First line is header | Checked; the first row is used as column names |
| Encode | utf-8 |
| Value separated | Comma(,) |
| Value wrap/quoation | Quote if needed |
| Row separated | NewLine(\n) |
Step 3: Import options
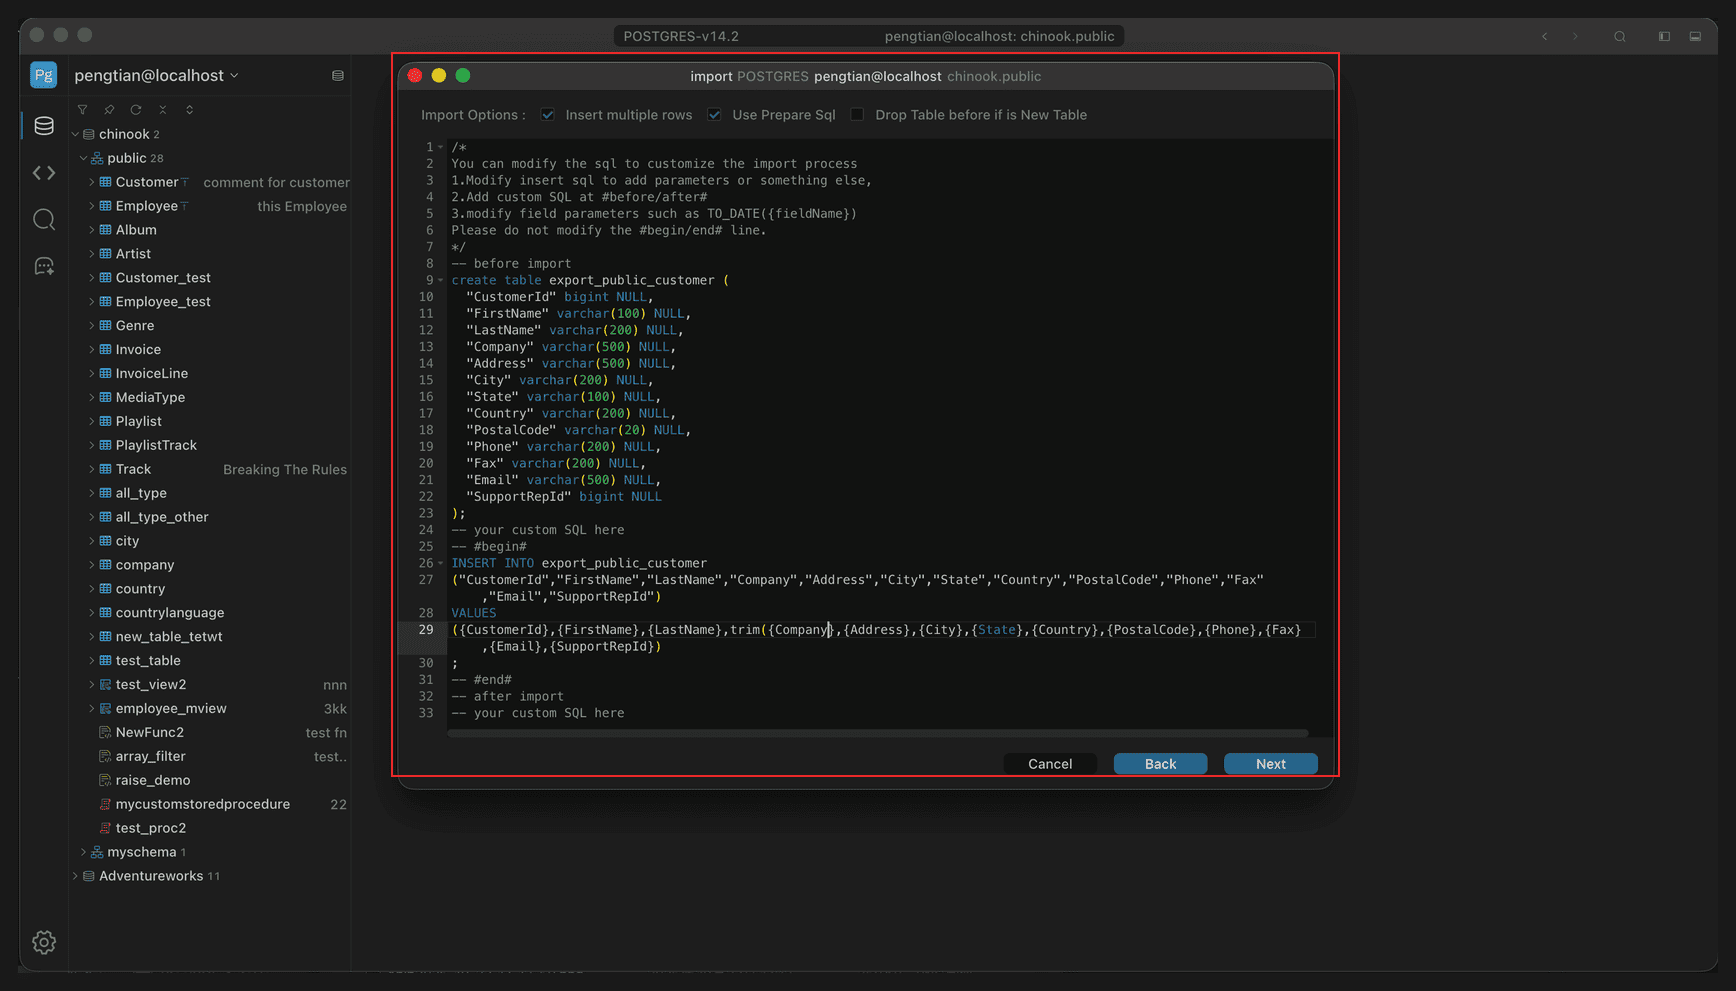
Full window view; the red box marks the editable import SQL template
| Option | Description |
|---|---|
| Insert multiple rows | Write multiple rows in one INSERT; faster |
| Use Prepare Sql | Use parameterized statements |
| Drop Table before if New Table | Drop an existing table with the same name before creating one (applies when such a table already exists) |
In the middle is the SQL template that will be executed. The template is editable; adjust it as needed before importing:
| What you want to do | Where to change it | Example |
|---|---|---|
| Adjust the create table statement | The create table after -- before import | Change column types, add defaults, add indexes or a primary key |
| Adjust the insert statement | The INSERT between -- #begin# and -- #end# | Add or remove columns, change the field order in VALUES |
| Fix data with functions | Inside VALUES of the INSERT | TO_DATE({fieldName}), trim({Company}), coalesce({State}, '') |
| Add custom SQL | The comment areas under -- before import or -- after import | Clear a temp table before import, run statistics or create indexes after import |
-- before import
create table export_public_customer (
    "CustomerId" bigint NULL,
    "FirstName"  varchar(100) NULL,
    ...
);

-- your custom SQL here          ← any SQL executed before import

-- #begin#
INSERT INTO export_public_customer ("CustomerId", "FirstName", ...)
VALUES (({CustomerId},{FirstName}, trim({Company}), ...));
-- #end#

-- after import
-- your custom SQL here          ← any SQL executed after import
Rules:
- Do not change the
-- #begin#and-- #end#lines; the importer uses them to locate the batch insert statement. - Write functions outside
{fieldName}, for exampletrim({Company})orTO_DATE({OrderDate}); they run for every inserted record. -- before importis the place for creating or clearing tables and creating temp tables;-- after importis the place for validation, statistics, and adding indexes.- Changes affect only the current import and are not saved as a template.
Step 4: Run
Click Next to go to the execution page:
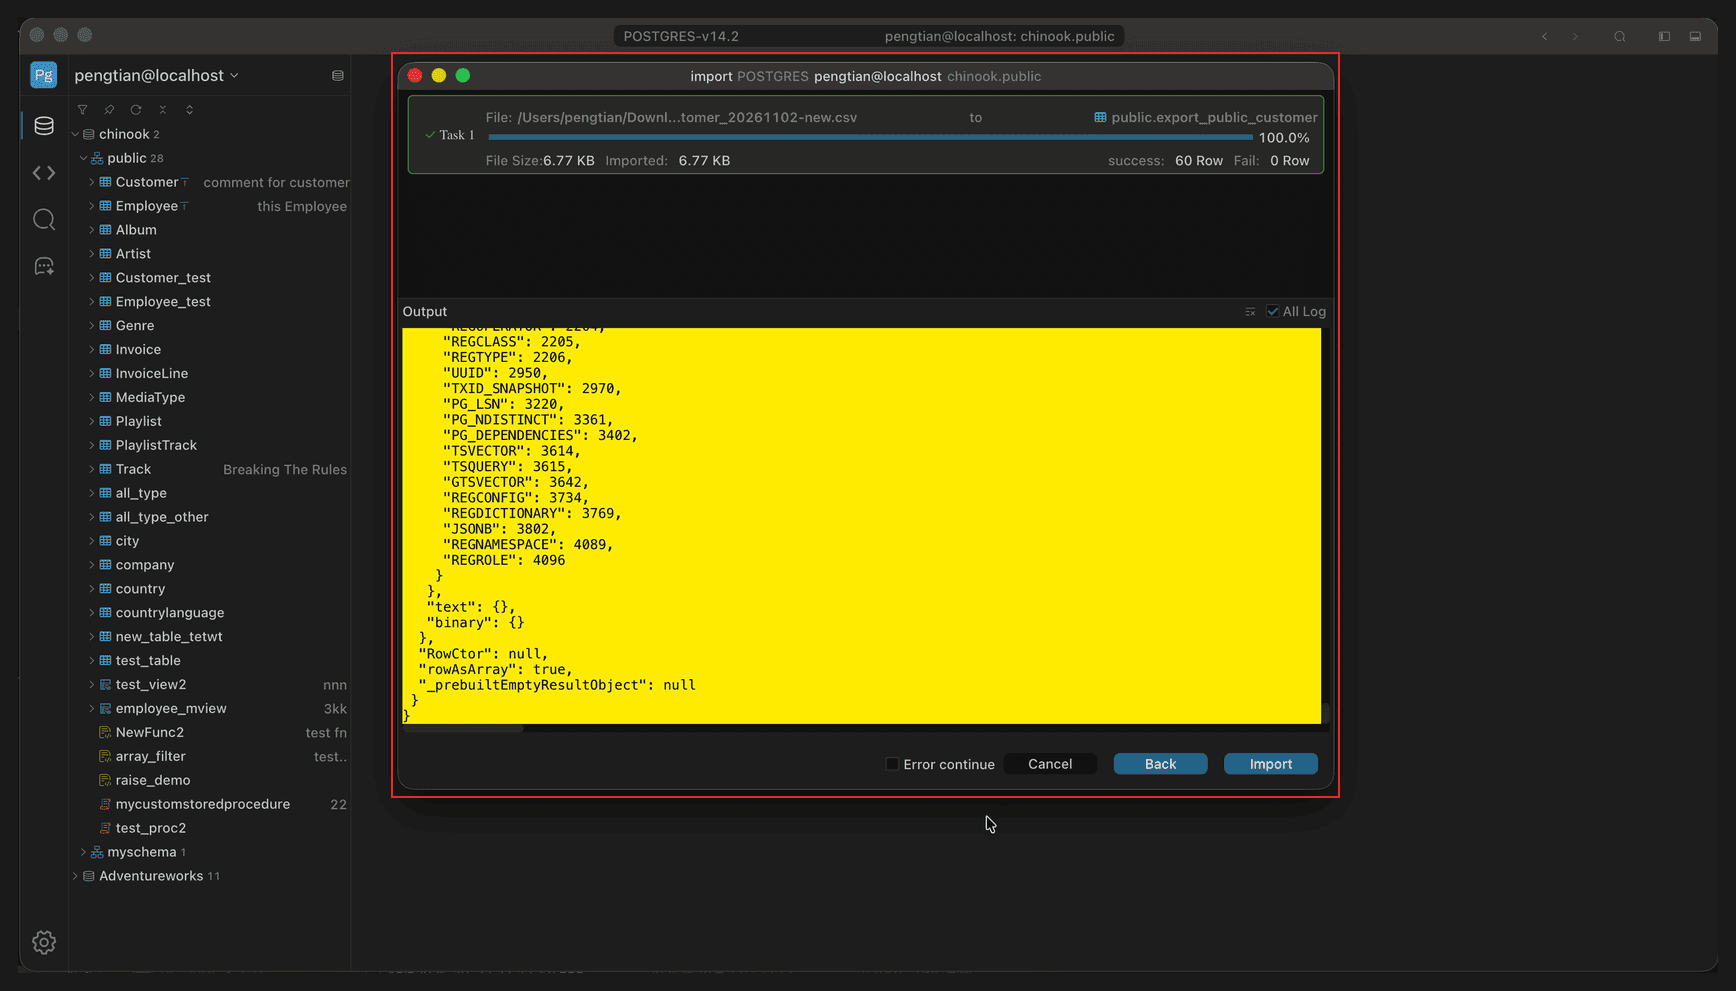
Full window view; the red box marks task progress and statistics
- Each import task shows a progress percentage, file size, and imported size.
success: 60 Row/Fail: 0 Roware the success and failure row counts.- Output below is the execution log; when something fails, look here for the specific statement.
- With Error continue checked, a single failed row does not abort the whole import.
When ready, click Import to start; Cancel cancels, and Back returns to the previous step.
After import
After the import finishes, the new table appears in the object tree on the left. Switch to Structure to see the columns and types actually created:
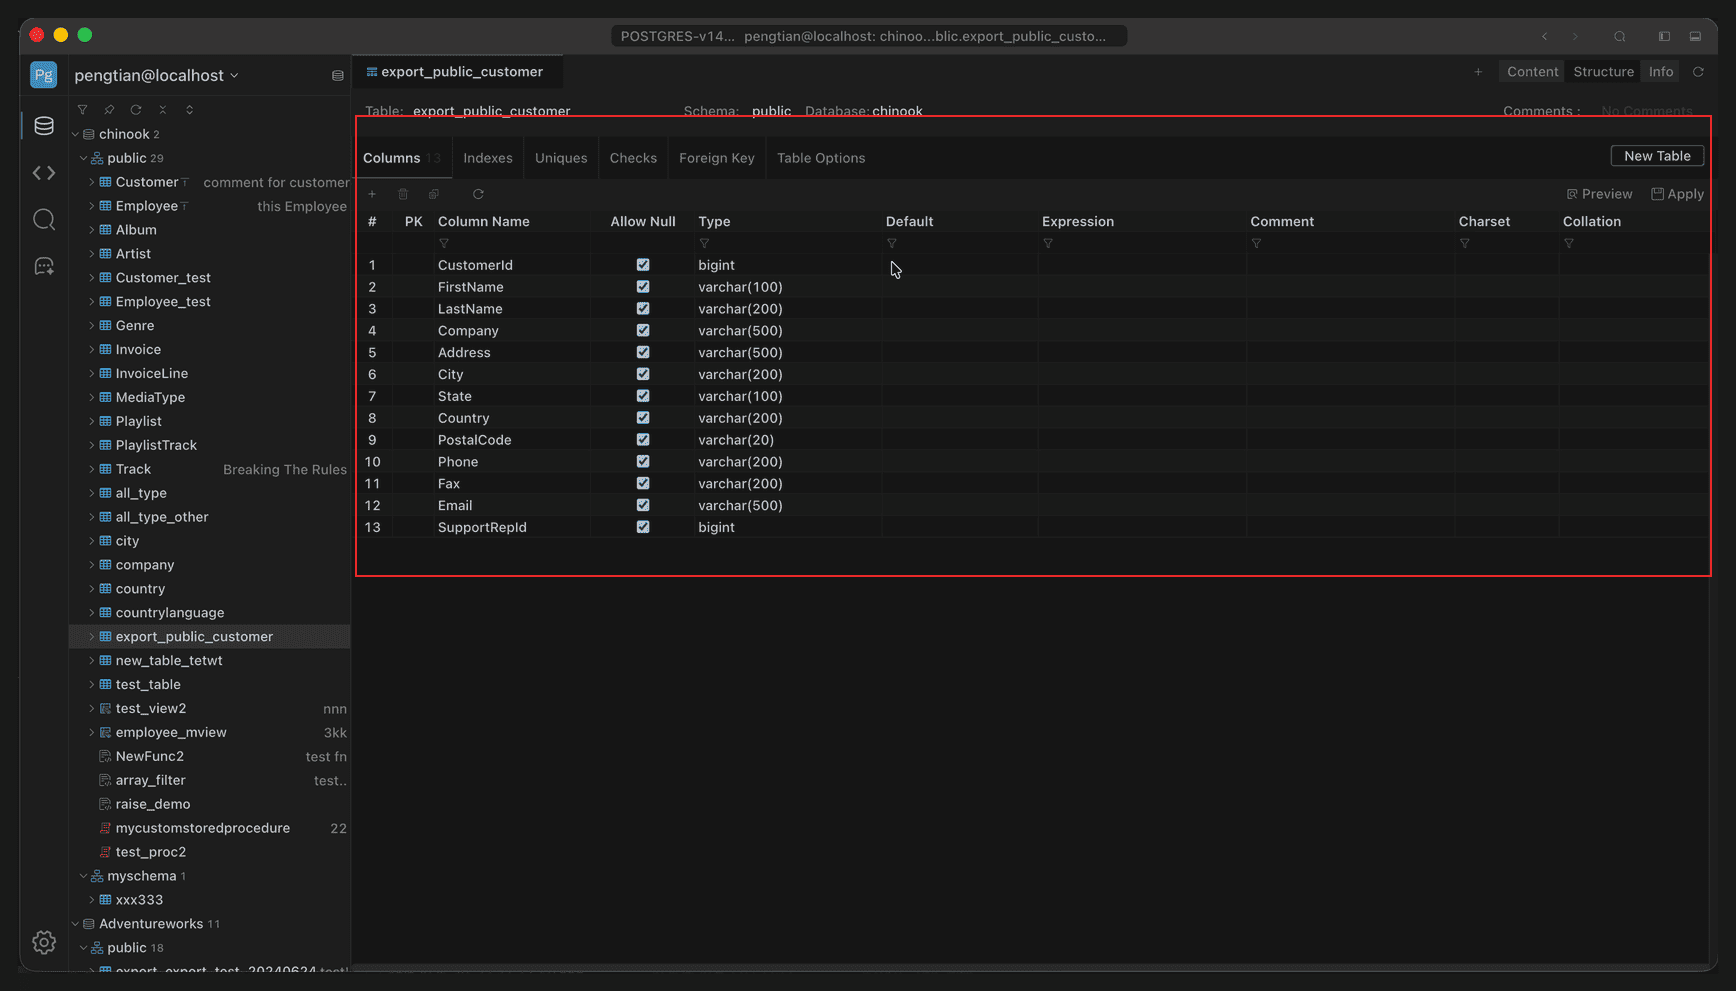
Full window view; the red box marks the column definitions of the new table
Column types come from Column Type on the mapping page, and the row count follows success on the task page. Import does not refresh tables that are already open; refresh manually (Cmd+R).
Export and import
The two are a pair: export writes query results to a file, and import writes the file back into a table.
- For export options, see Export Data
- The CSV delimiter and encoding of an imported file must match those used at export time, or columns will shift.